Hey Friends!
Cariel here with another fantastic all-natural living idea! Let me tell you all about it because I am so excited about this one!
(You’ve probably already heard of these, but let me tell you about them again, anyways, because these are absolutely outstanding and everybody should try them… and everybody should try making their own!!)
We all know that plastic is a huge driver of the environmental and health problems we’re facing today.
But, because plastic is cheap, convenient, and used in most facets of modern life, it can be hard to find alternatives without some kind of sacrifice… Which means that in addition to adding to the problem, we also give ourselves a big helping of guilt every time we use it.
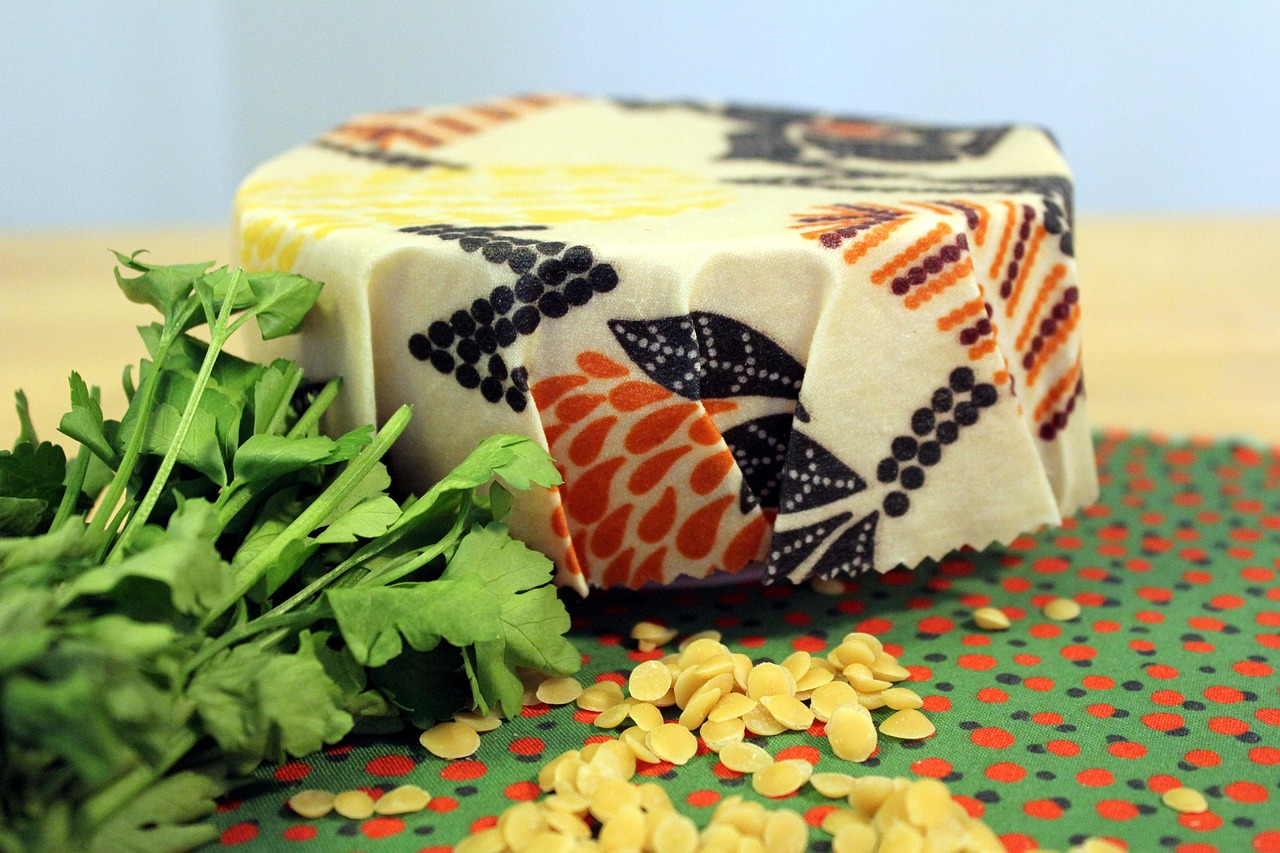
And that’s why I think you’ll LOVE making your own beeswax food wraps.
Why? Well…
They work wonders! You can wrap food in them, cover containers with them, and even make snack containers with them. (Honestly, you can use them to wrap anything you need to stay fresh without drying out, getting soggy, or spoiling.)
Your food will stay fresh and delicious for a long time, without taking on any odd flavors or absorbing microdoses of microplastics!
They’re just as convenient as plastic wrap and baggies… but goodbye single-use! These wraps will just about last forever if you take care of them.
They’re incredibly inexpensive to make and will pay for themselves hundreds of times over during their usable lifetime.
(If you buy beeswax wraps, you’ll pay a pretty penny. Making your own is a great way to save on both the wraps themselves and the price of plastics you’d use over time.)
Also, they’re compostable! After you’ve gotten as much use from them as you want, simply cut them up into little pieces and dump them into the compost heap.
(Honestly, this same process/project could feasibly be tried as an organic weed-barrier in the garden… I’ll try that and if it works, write a post with the results for you guys!!)
Caveats to Using Beeswax Wraps
The drawbacks to using these wraps are few, but important.
It’s advised that you do not use them to store raw meat.
You cannot use hot water to wash these, and you cannot scrub them too awfully hard. If you need to store raw meat, I think it’s feasible that you could wrap it first in butcher paper, and then wrap it with the beeswax wrap, but even this could be risky. Raw meat is safer when stored in glass or by opting for a single-use plastic option, instead.
These wraps cannot be heated or used on piping-hot food.
This is similar to plastic food storage, so it’s not a big change, but it’s for a very different reason.
The risk is not of infusing your food with plastic and chemicals, but that the beeswax will melt out of the cloth (probably into your food – which is not harmful, but you may not want that, regardless) and will leave you with a piece of cloth that no longer works for storing much of anything.
Also, when you use these wraps, and especially when they’re freshly made, they’ll often leave a small bit of beeswax residue on the edges of your dishes. This is no problem. It washes/wipes away easily, and does not leave any residues on your food, so, really, no worries about that.
The only other thing, that probably isn’t a big deal to many people, is that the wraps need to be washed. It’s really just a shift from seeing food storage as throw-away to seeing these wraps as kitchen tools that need to be cared for and cleaned… Which is easy when you’re using these beautiful and all-natural creations you’ve made yourself!
Besides those considerations, there’s really nothing these wraps can’t do as well as, or better than, plastic!
What do I Need to Make Beeswax Wraps Myself?
Beeswax wraps are simply cloth cut-outs infused with a mixture of three all-natural ingredients that work together to make the wraps airtight, sticky, and pliable.
These ingredients are:
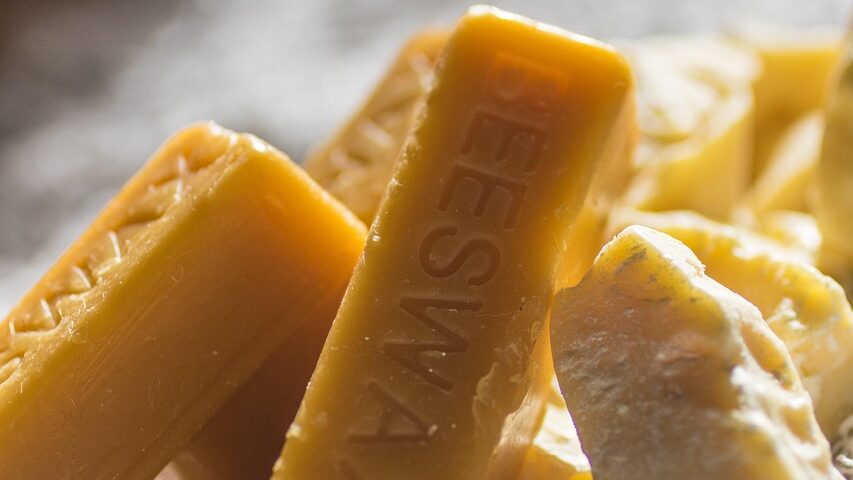
- Beeswax – creates an air-tight, sealed cloth, but turns rigid once cooled, and will crease and crack if you don’t add anything else to your wrap recipe. This is the beeswax I recommend.
- Jojoba oil – makes the wrap pliable so you can wrap things without the beeswax cracking. This the Jojoba oil I recommend.
- Pine resin – makes the wrap sticky (but not too sticky!) so it will adhere to itself and containers when you press it down. This is the pine resin I recommend.
(As an Amazon Associate, I earn from qualifying purchases.) Additionally, I am not a doctor or health physician, and the advice given here should not be used in place of professional medical advice. Please do your own research.
(You can use beeswax only, but the wraps will be very stiff and not sticky enough. The jojoba oil and pine rosin really make all the difference for creating wraps that work the best.)
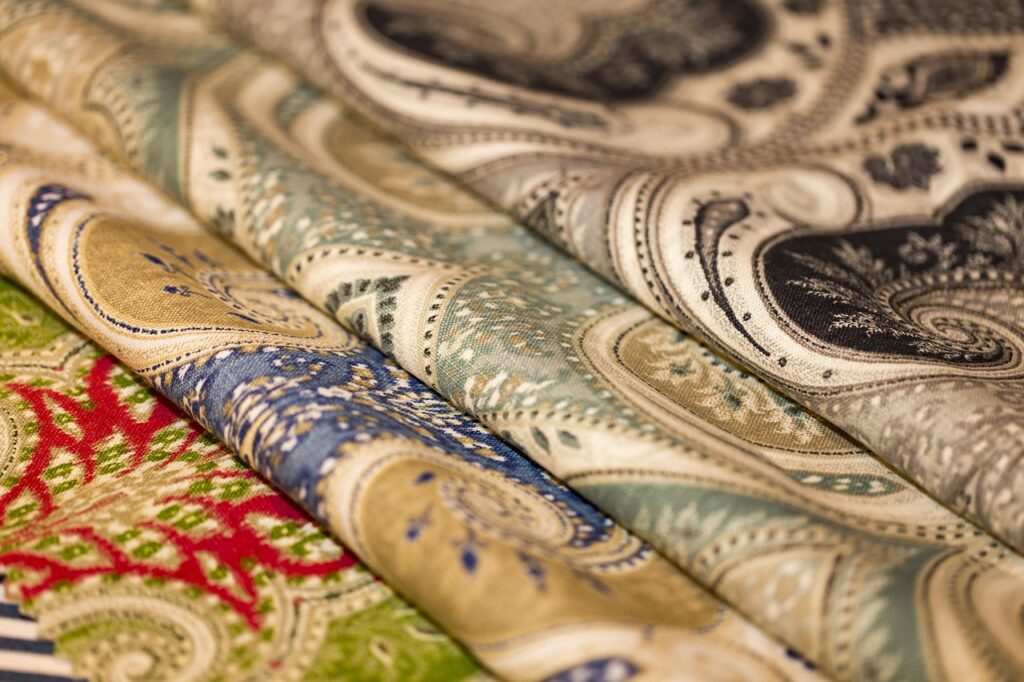
You can use any strong, all-natural, 100% plant fiber cloths as your base. Many people love to use beautiful prints and colored cloths, which are very lovely in the kitchen or if making wraps as gifts for others!
Your best options are cotton, hemp, and linen. Use organic cloth, if possible.
Do not use synthetic (man-made) blends because the synthetics cannot, and therefore will not, absorb the beeswax mixture — in fact, they will repel it and cause the project to fail.
Synthetics include polyester, rayon, nylon, spandex, etc.
Tools you’ll need:
- Pencil and Ruler for tracing or drawing the shapes you want to cut out
- Scissors orPinking Shears to cut out your wraps (pinking shears prevent the cloth raveling and create those lovely zig-zagged edges) These are the scissors I recommend.
- Glass Jars and Metal Pots to use as a double boiler, and something metal or wooden – like canning jar rings or chopsticks -to lift the glass jar off of the bottom of the pot so the direct heat won’t shatter it. This is the double boiler I recommend.
- Parchment Paper to create a non-stick, heat-safe work surface This is the parchment paper I recommend.
- Large Baking Pan or Clothing Iron to melt the ingredients into the cloth These are the baking pans I recommend.
- Paint Brush that you’ll dedicate to this use only These are the paint brushes I recommend.
(As an Amazon Associate, I earn from qualifying purchases.) Additionally, I am not a doctor or health physician, and the advice given here should not be used in place of professional medical advice. Please do your own research.
How to Make Beeswax Wraps
Step 1: Cut Out Your Wraps
Using the scissors or pinking shears, cut out your cloth into the shapes and sizes you want to use in your home.
Get creative at this step!
For example, you might want to use the storage containers you actually use in your home as stencils by laying the container(s) upside down on the cloth and trace out an outline that’s about two inches wider than the container.
You could decide to make several wraps of basic sizes. Perhaps 6-8 inches for a small wrap, 10-11 inches for a medium wrap, and 14-plus inches for a large wrap.
What you plan to store can also help you decide how big your wraps need to be. For instance, if you want to wrap large loaves of homemade bread, you’ll want to make sure the wrap is long enough and wide enough to accommodate the loaves… if you’ll be wrapping fruits or covering jars, make wraps that are a good fit for those.
Also, the shapes you want to use can be anything you want. If you want round wraps for covering round dishes and rectangular wraps for covering rectangular dishes, make them how you need!
(Quick tip: If you make square or rectangular wraps, consider trimming off the corners, so there’s less excess for you to press together.)
And finally, if you want to make snack pouches, you’ll want to sew them up first, before soaking them in the beeswax mixture.
Step 2: Add the Beeswax, Jojoba Oil, and Pine Rosin
There are a couple of ways you can do this, and I’ll try to give an overview of them without confusing anybody! 🙂
No matter how you go about this process, please know that beeswax and pine rosin are notoriously hard to clean off of any surface.
I suggest working with glass mason jars and metal pots that you will only use for these materials in the future. The same for your brush and stirring utensil.
All of these tools will not be useful for anything else after this project. (And you want them to be available again in the future if you use these materials for any other homemade projects!)
Buying Refined Materials vs Harvesting Your Own
If you buy the beeswax and pine rosin, I recommend that you buy them in pellet form. Jojoba oil is a liquid, of course. To combine them, I recommend combining the jojoba oil and pine rosin in a double boiler and letting the rosin melt. Then pour the hot mixture over the beeswax pellets and put that into the double boiler to melt them completely. Stir it to combine the ingredients well, and then they’re ready to use!
If you harvest your own beeswax and pine resin, (which I encourage you to try!) you’ll need to process both to get a clean, pure product. To explore these skills further, watch this video to learn how to render beeswax, and this video to learn how to render pine resin into a clean and usable rosin.
Quick note: you may’ve noticed the terms pine resin and pine rosin in this post or when shopping for ingredients, and you’re probably wondering, “what’s the difference between the two? Is that a typo?”
The answer is simple, and, no, it’s not a typo!
Resin is the dried clumps of sap that form from on a plant or tree when it is wounded. This resin works like a scab for the plant, preventing infection and pests from getting into the wound and weakening or killing it.
When people collect this resin and melt it down into a liquid, volatile oils in the resin evaporate. (In the case of pine resin, the fumes that evaporate are quite flammable!)
The thick, gummy liquid that’s left behind, and that cools into a solid mass, is called rosin.
You’ve probably heard of pine rosin before. It has a long history of being used medicinally, as a waterproofing material on ships, and to give things a sticky surface – like the bow of a fiddle, so that it will make a musical sound instead of sliding across the strings with no sound.
The Recipe for DIY Beeswax Wraps
In your recipe, you’ll probably find that using equal parts jojoba oil and pine rosin work best, though some people prefer to use less jojoba oil. You can also experiment with different kinds of oil or try out vegan alternatives to the beeswax.
Please don’t be afraid to do deeper research or to experiment with different ingredients and ratios to see what works best for your region, climate, and personal needs!
To get your started, here’s a recipe that works great for most people:
- 6 Tablespoons of jojoba oil
- 6 Tablespoons of pine rosin
- 1 cup of beeswax
(As an Amazon Associate, I earn from qualifying purchases.) Additionally, I am not a doctor or health physician, and the advice given here should not be used in place of professional medical advice. Please do your own research.
This recipe will easily cover about 6 large wraps, and it can easily be doubled, tripled, or more to make as many as you need. Any mixture that’s left over will cool and harden, so just cover it, put it away in a cabinet, and use it later to refresh your wraps when they need it!
How to Make the Wraps with an Electric Iron
This is probably, in my opinion, the best way to make the wraps.
Start by laying a towel, pillowcase, or other thicker cotton cloth down on your work surface. Then lay a large piece of parchment paper on top of that.
Set your iron to high heat, no steam.
Stack the cloths that you’ve cut out on top of each other, with the largest on the bottom, working your way up to the smallest on top, on top of the parchment paper.
Next, use your paint brush to brush the liquid mixture onto the top wrap. It will cool quickly, but don’t worry about that. It’s also perfectly fine if chunks of the beeswax that build up on the brush fall off onto the wrap you’re working on. Just brush a coating onto the entire piece of cloth. Don’t forget the edges!
After the top piece of cloth is coated in the beeswax mixture, cover it with a second large piece of parchment paper and use the iron to melt the beeswax into the cloth. Any excess wax will be absorbed by the stack of cloth beneath.
It’s easy to see the cooled wax melt and soak into the cloth through the parchment paper, and it only takes about a minute or less to saturate the whole thing.
Once the first wrap is done, hang it to dry. It takes about 10 minutes for each one.
Now, repeat this process for each piece of cloth until all of your wraps are saturated in the beeswax mixture.
After they’re all done and dried, you can try them out immediately!!
Celebrate!! Delight in the beautiful and incredibly useful wraps you’ve made for your home!!
How to Make the Wraps in the Oven
This process is nearly the same as using an iron, but you’ll need a sheet pan covered in parchment paper instead of a cotton cloth surface, and an oven heated to about 200 degrees Fahrenheit.
Start by laying out as many of your cotton cloths as you can fit on the sheet pan. Then brush them with the molten liquid beeswax mixture. Again, it will cool as you brush it on, and that’s perfectly fine!
When you’ve covered all of the cloths in wax, pop them in the oven for about two minutes. Keep a close eye on them, and you’ll see the wax melt again.
As soon as the wax has melted to a liquid, pop them out of the oven and use your brush to even out any puddles of wax. Make sure you get the edges evenly and thoroughly covered, too!
You can also add more of the wax mixture if there are any dry spots, and then put them back into the oven to even everything out again.
Hang the wraps to dry. They’ll be dry in about 10 minutes.
Repeat this process with the rest of your cloths until you’ve done them all!
Now, try them out and celebrate!! Woo-hoo!! You’ve got a stack of reusable beeswax wraps that you made!!
A variation of the oven method is to sprinkle the beeswax pellets, pine rosin pellets, and the jojoba oil over the surface of each cloth without melting them together first. Once they melt in the oven, pull them out and use the brush to spread the liquid evenly all over the cloths and then hang to dry…
If you think this might work better for you (for instance, if you can’t or don’t want to use the double boiler method to melt the ingredients together first) by all means experiment and see what works best for you!
Using Other Methods to Make the Wraps
There are many, many different ways to infuse the cloth with your beeswax mixture. It really comes down to the appliances or set up that you have to work with – from a sandwich press to a solar oven – and your own creativity and ingenuity!
You don’t have to go out of your way or spend a lot of money to make these wraps… just use what you have on hand, and remember that the containers and tools you use will be hard to get the wax, oil, and rosin cleaned out of. But this process should be a simple, inexpensive, hardy, once or twice a year project that you use daily in your kitchen.
Don’t be afraid to try many things to see what works for you!
How to Use Beeswax Wraps
To use your wraps, just press them over an open container or wrap them around anything you want to seal up. They will stick to themselves and make an excellently airtight seal.
When you use them to cover a container, you can press them around, and their stickiness will adhere to the surface. To get the best seal, use the warmth from your hands to melt the beeswax a little bit so that it adheres to the surface even better!
Another way to “use” beeswax wraps is to give them as gifts! I can’t think of anyone who wouldn’t find them useful, versatile, and beautiful – and it’s a great way to introduce others to a plastic-free lifestyle with tact and grace!
How to Store Beeswax Wraps
Storing the wraps is pretty simple: just store them in a clean, dry, cool space.
You can use a wooden box, a glass casserole dish with a lid, in a drawstring cloth bag, or a clean drawer in your kitchen.
You don’t have to worry about them, as long as they aren’t exposed to heat, but it’s a good idea to keep them to be covered. Because of their tacky surface, dust, hair, and anything else floating in the air will stick to them.
How to Care for Beeswax Wraps
These wraps are very easy to care for. If they are used to wrap something that won’t make them dirty or greasy, you can just reuse them.
If you want to wash them, use cold water and an alcohol free natural mild soap. Then dry them with a clean cloth or hang them up to air dry. This is the soap I recommend.
Just avoid using hot water, as, again, the wax will melt out of the cloth.
How Long Will My Wraps Last?
These wraps last anywhere from six months to a whole year if you take good care of them!
You’ll notice when they start to lose their waxy feel and adhesive properties.
At that point, just re-coat them in your beeswax/pine rosin/jojoba oil mixture using the method you prefer, and they’ll work again like brand new!
I hope you’ve decided to try these wraps out!
Whether you need to keep cheese from molding too soon, want to carry dried herbs with you on a camping trip, or are heading to a big ‘ole potluck, these wraps are absolutely wonderful for everyday use!!
I hope you’ll make them, and I hope that if you find a recipe, ratio, or method that works better for you, or have any other tips and tricks about using or caring for beeswax wraps, that you’ll leave a comment for all of us to enjoy!
Until next time, keep up the awesome, all-natural lifestyle my friends!
Love,
Cariel
Sources:
Bee’s Wrap® FAQ | Reusable Food Storage. Bee’s Wrap LLC Website. Retrieved February 04, 2026.
Comparative Analysis of Pine Resin and Rosin. SINOCHEM. November 05, 2025. Retrieved February 04, 2026.
Making Beeswax Food Wrap with Foraged Pine Resin. YouTube.com by Humming Catfish. January 23, 2023. Retrieved February 04, 2026.
Reduce Cling Wrap: DIY Beeswax Wraps. Film #10 with Morag Gamble, Our Permaculture Life. YouTube.com by Our Permaculture Life. August 28, 2016. Retrieved February 04, 2026.
Leave a Reply